
Testing & Logging: How to Know Your Code Actually Works
Data scientists skip this, engineers don't, and it shows.

👨💻 Welcome to the Engineering Skills for Data Scientists series, where I’ll be teaching the engineering skills that quietly separate data scientists who can ship from the ones who can’t. This is article 2 of 5. You can find the full series here.
Here’s a question worth asking yourself…
When was the last time you were genuinely sure your code worked?
Not “it ran without errors.” Not “the dashboard looked right.” Not “my colleague said it looked good.” Actually sure.
Most data scientists, if they’re honest, don’t operate from that place. They operate from hope. The code seemed to work on the sample I checked. The model trained without crashing. The pipeline ran end-to-end at least once.
That’s a fine place to be when you’re exploring. It’s a terrible place to be when your code is making decisions in production.
There are two engineering habits that move you from hoping to knowing:
Testing: checks your code does what you think it does, before it ships.
Logging: gives you visibility into what your code is doing, after it ships.
Together, they’re how engineers sleep at night. And they’re surprisingly underrepresented in most data science workflows, mostly because nobody taught us how.
And to be fair, when you’re moving fast on analysis, it’s hard to justify the upfront cost. Until something breaks in production at 2am and you’re staring at a model that’s been making wrong predictions for a week.
In this article, I’ll walk you through both, the practical minimum a data scientist needs.
We’ll also look at how to use AI to make adopting these habits significantly cheaper than it used to be, including the specific setup that turns AI from a generic code generator into a competent assistant for your conventions.
Let’s get to it!
Here’s what we’ll cover
Part 1: Testing your code before it ships (and how to use AI to make it cheap)
Part 2: Logging what your code does after it ships (and how to use AI to make it cheap)
🎥 Try it on your own (a short walkthrough + exercises)
Why do these two go together
Part 1: Testing your code before it ships
A test is just a piece of code that checks whether your other code does what you think it does. That’s it!
You give it some input, you say “here’s what I expect,” and you let the test tell you if reality matched expectations.
Now, something you might be wondering about. If you've been writing Python for a while, or you've been around engineers, you've probably heard three terms thrown around: assert, unit test, and pytest. They're related, but they're not the same thing.
assertis a Python keyword. It’s the check itself: “This better be true, or raise an error.”Unit test is the kind of test you’re writing: one that checks a single function in isolation, with no database, no API calls, no side effects. Just the logic.
pytestis the runner. It finds your tests, executes them, and reports which passed and failed.
Put them together, and a unit test is: a function that uses assert to check one piece of logic, organized so pytest can find and run it.
Unit tests are 90% of what you’ll write as a data scientist. The other kinds (integration tests, end-to-end tests) matter on a bigger scale, but unit tests are where the payoff is highest, so that’s what we’ll focus on here.
But before you can write tests, your code has to be testable. This is the part nobody tells you about.
What “testable” code looks like
Most data science code is written as one long function or notebook cell that does everything: loads the data, transforms it, fits the model, evaluates it, saves the output.
There’s nothing wrong with that for exploration. But it’s almost impossible to test.
Here’s a function that’s hard to test:
def run_churn_analysis():
    df = pd.read_csv("data/customers.csv")
    df = df[df["tenure_days"] >= 30]
    rate = df["churned"].sum() / len(df)
    print(f"Churn rate: {rate:.2%}")
    df.to_csv("data/eligible_customers.csv")
What would you even test? It reads a specific file, mutates it, and writes another specific file. Everything is glued together.
Here’s the same logic, refactored to be testable:
def compute_churn_rate(customers: pd.DataFrame) -> float:
    """Returns the share of customers who churned this month.
    Excludes customers who signed up this month (incomplete tenure).
    """
    eligible = customers[customers["tenure_days"] >= 30]
    if len(eligible) == 0:
        return 0.0
    return eligible["churned"].sum() / len(eligible)
One small function. Takes a DataFrame, returns a number, does one thing with clear business rules: exclude new customers, return the share that churned. Now you can test it independently with whatever data you want, no files, no side effects, no print statements to read.
💡 Quick tip: separate logic from the I/O. The logic (transforming data, computing metrics, applying business rules) is what you test. The I/O (reading files, writing to databases, calling APIs) sits outside, in glue code that’s harder to test but doesn’t need to be tested as carefully.
Writing your first real test
Python’s built-in testing tool is pytest.
Install it once with pip install pytest, then write a test in a file that starts with test_:
# test_churn.py
import pandas as pd
from my_module import compute_churn_rate

def test_compute_churn_rate_excludes_new_customers():
    df = pd.DataFrame({
        "tenure_days": [45, 60, 10],   # third customer is too new
        "churned": [True, False, True]
    })
    result = compute_churn_rate(df)
    assert result == 0.5  # only 2 eligible customers, 1 churned
Run it from your terminal with pytest. If the function works, the test passes silently. If it doesn’t, you get a clear error telling you exactly what failed and why.
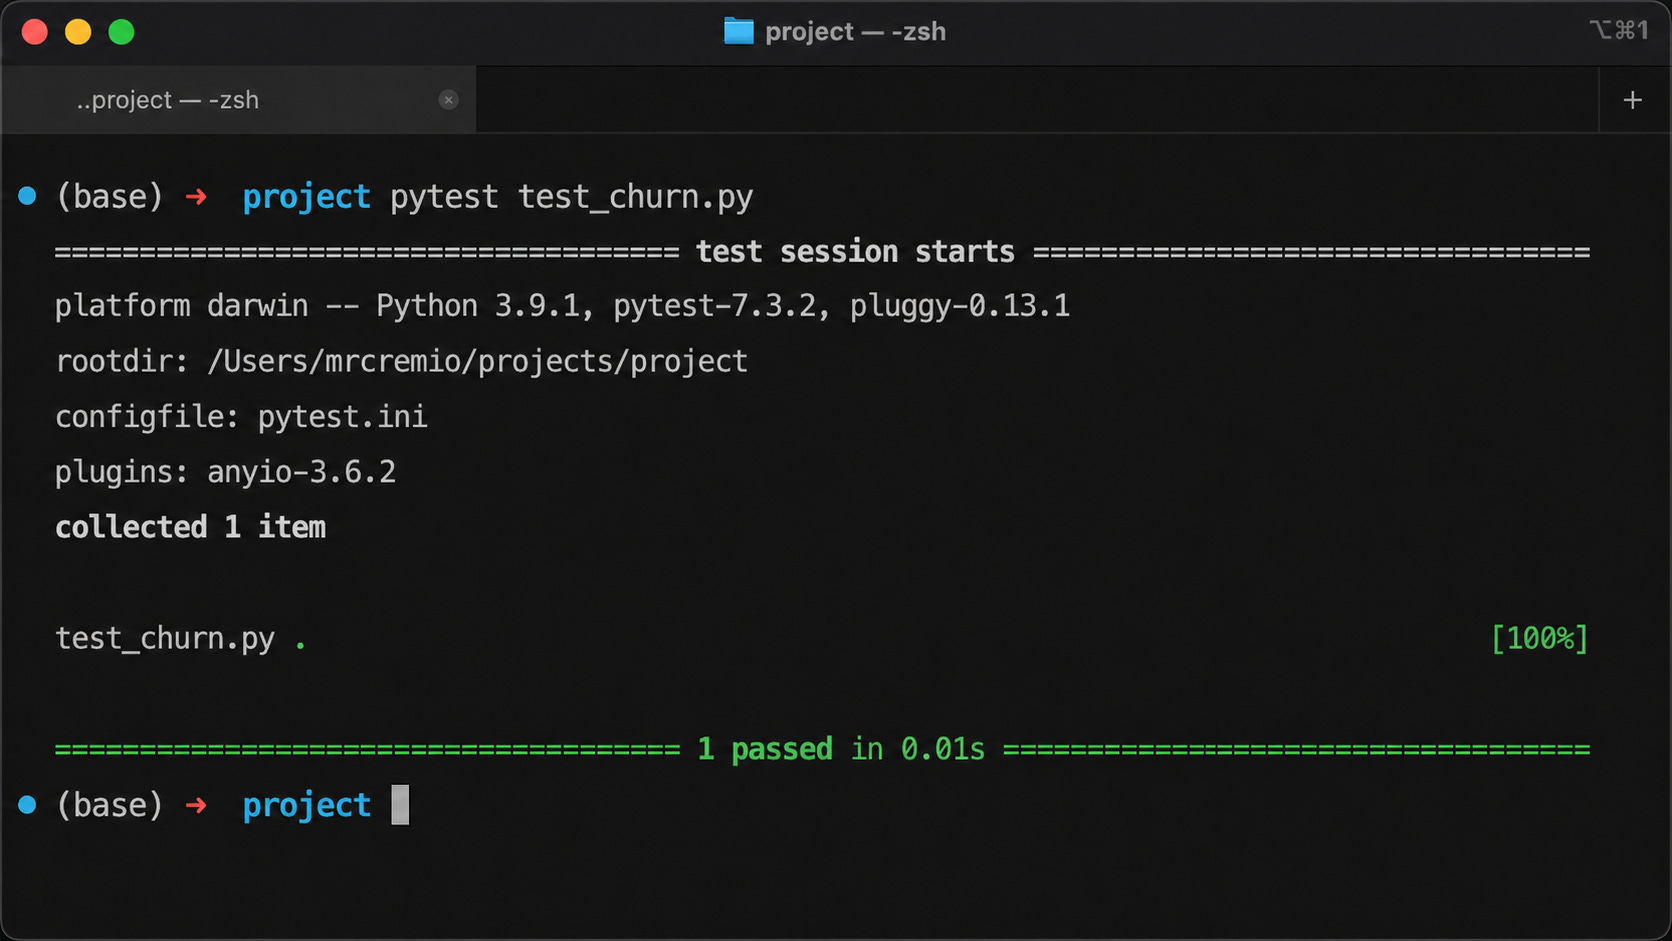
That’s a test. One function, three lines, no ceremony.
Notice what makes this test actually useful: it pins down a specific business rule (the tenure filter) and a specific behavior (only eligible customers count toward the rate). If someone removes the filter, changes the threshold, or includes everyone in the denominator, the test fails immediately.
The pattern that holds up across almost any test:
Arrange: set up the input data
Act: call the function
Assert: check the output is what you expected
What’s worth testing
Not everything needs a test.
The right answer is closer to “test the things that would cause real damage if they broke quietly”:
Functions that compute metrics (a churn rate, an ARPU, a conversion). If these are wrong, your decisions are wrong.
Feature transformations that feed into a model. If these are wrong, your predictions are wrong.
Business logic (filtering, deduplication, joining rules). If these are wrong, your downstream analysis is wrong.
Edge cases you’ve already been bitten by. Once a bug shows up, write a test that would have caught it.
You don’t need 100% coverage. You need to cover the things that, if wrong, would hurt.
Using AI to make testing cheap
The reason most data scientists skip testing isn’t that they don’t see the value. It’s the upfront cost. Writing tests for a function you already wrote feels like double work.
AI changes that calculation, but only if you set it up right.
Pasting a function into Claude and saying “write tests for this” gives you tests. It doesn’t give you good tests.
The single highest-leverage move is setting up a project-level instruction file. Most AI coding tools (Claude Code, Cursor, Windsurf) read a file called CLAUDE.md or AGENTS.md in your project root and load it into every session automatically.
That’s where you put your testing conventions.
A useful starter:
## Testing
- Use pytest. Run with `pytest tests/ -v`.
- Tests live in `tests/`, matching the structure of `src/`.
- Fixtures go in `conftest.py`.
- Use `unittest.mock` for mocking. Never call real APIs in tests.

## Testing rules
- Never modify existing tests to make them pass. Fix the implementation instead.
- Write the failing test before fixing any reported bug.
- Mock network calls and time. Never use real credentials.
- Aim to cover the logic that, if wrong, would hurt: metrics, transformations, business rules.
With this in place, AI defaults to your standards instead of generic patterns. The single most important rule is the first one under “Testing rules.” Without it, AI will quietly change your tests to make them pass instead of fixing the actual bug, and you’ll lose the entire point of testing.
A few prompts that work well once the conventions are set:
“Write pytest tests for this function. Cover the happy path and at least three edge cases.” You get a working test file in seconds.
“What inputs could break this function?” This is genuinely useful, even if you don’t use the tests it writes. AI is good at surfacing edge cases you didn’t think of.
“This function is too tangled to test. Refactor it so the logic is separable from the I/O.” Then you write tests against the refactored version.
💡 AI will happily generate tests that pass without actually testing anything meaningful. Tests that just assert the function returns something, or that mock so much that nothing real gets verified. Read what it gives you. The skill isn’t getting AI to write tests, it’s knowing which tests are worth keeping (that’s still up to the human to decide).
Part 2: Logging what your code does after it ships
Testing catches problems before your code runs in production. But once it’s out there, you need a different tool: logging.
Logging is how your code tells you what it’s doing while it runs. Without it, when something goes wrong, you’re guessing. With it, you can actually answer questions like:
When did this start failing?
What was the input?
Where in the pipeline did it break?
Why print() doesn’t cut it
Every data scientist’s first instinct is to debug with print(). It works fine in a notebook. You see the output immediately, you check it, you move on.
In production, print() falls apart for three reasons:
Nobody’s watching the output: Your code runs at 3am on a server you’ve never logged into. There’s no one to read the print statements.
The output disappears: Print goes to stdout. If the process crashes or stdout isn’t captured, the output is gone.
Every message looks the same: A print is a print. There’s no way to say “this one is important, this one is just debug noise.”
What you need is something that records what your code is doing, persists it somewhere you can read later, and lets you separate the important from the routine. That’s logging.
What logging actually does
Python has a built-in logging module. The minimum setup:
import logging
logging.basicConfig(level=logging.INFO)
logger = logging.getLogger(__name__)
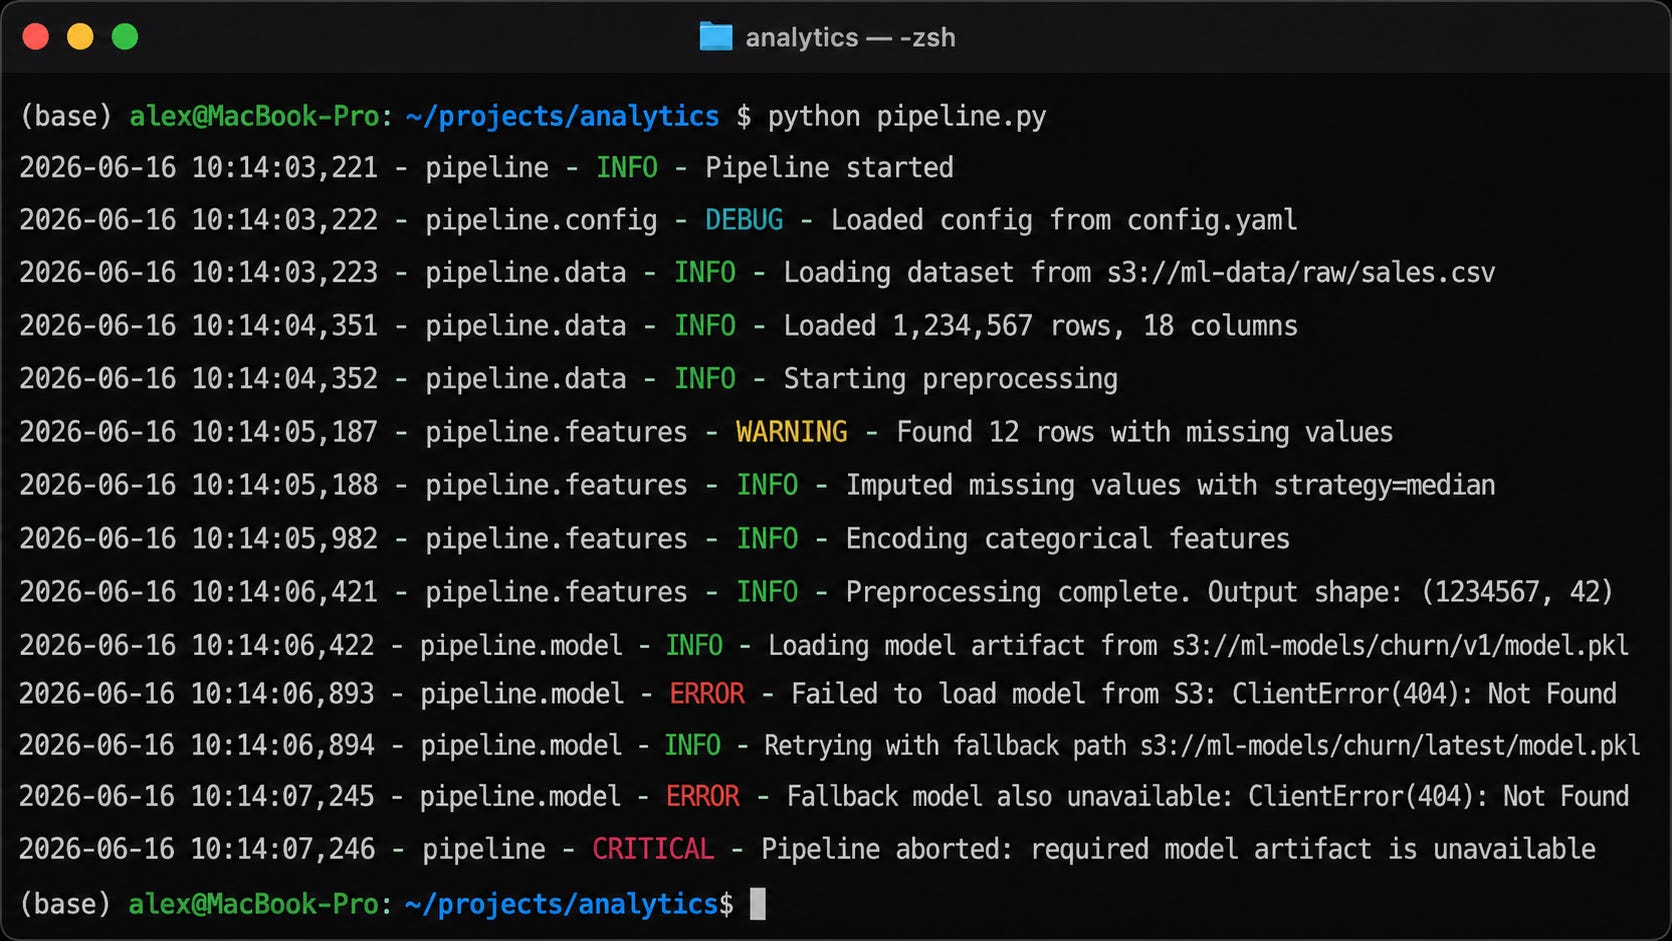
logger.info("Pipeline started")
logger.warning("Found 12 rows with missing values")
logger.error("Failed to load model from S3")
Three things to notice:
logger.info,logger.warning,logger.errorare levels. They let you mark how important each message is.The messages go wherever you configured them to go (the console by default, but easily a file or a log aggregator like Datadog).
You can filter by level when you read them later. Show me only the errors, or only the warnings and errors.
The five logging levels (and when to use them)
DEBUG: noisy details only useful when actively debugging. Variable values, intermediate states.
INFO: normal events you want a record of. Pipeline started, file loaded, model saved.
WARNING: something unexpected, but not fatal. Missing values, fallback to default, slow query.
ERROR: something failed. An exception, a request that didn’t go through, a metric that couldn’t be computed.
CRITICAL: the system is broken. Database down, model file corrupted, pipeline can’t continue.
💡 If you only remember two levels, remember
INFO(things I want a record of) andERROR(things that broke). That covers most of what you’ll need.
How to log well
The mistake most beginners make is logging things that feel important but don’t help you debug.
Things like "got here" or "step 3". These tell you the code ran, but nothing else.
Useful log messages give you the state that would help you debug:
# Not useful
logger.info("Starting model training")

# Useful
logger.info(f"Starting model training with {len(X_train)} samples and {X_train.shape[1]} features")
The second one tells you, six months later, when something looks off, whether your training data was the size you expected.
A few more rules of thumb:
Log the inputs and outputs at boundaries: When data enters or leaves your pipeline, log enough that you can reconstruct what happened.
Log the metric values for things you care about: Latency, row counts, prediction distributions.
Log exceptions with
logger.exception()inside anexceptblock. It captures the full traceback automatically.
Where logging fits in your day-to-day
A few concrete places this pays off:
Training pipelines: log the dataset size, feature stats, hyperparameters, and final metrics. When a model performs worse than the last one, you can trace what changed.
Inference endpoints: log request payloads, prediction outputs, and latency. When predictions start looking weird, you have a record.
LLM-powered systems: log the prompts, token counts, and any validation failures (this is where logging plays nicely with Pydantic from last week).
Where logging fits in the bigger picture
One thing worth mentioning, since it’ll come up the moment you start working at scale: logging is one piece of a broader practice called observability.
Observability has three pillars:
Logs are what we just covered, individual messages your code writes out as it runs.
Metrics are numerical measurements over time (latency, error rate, prediction volume).
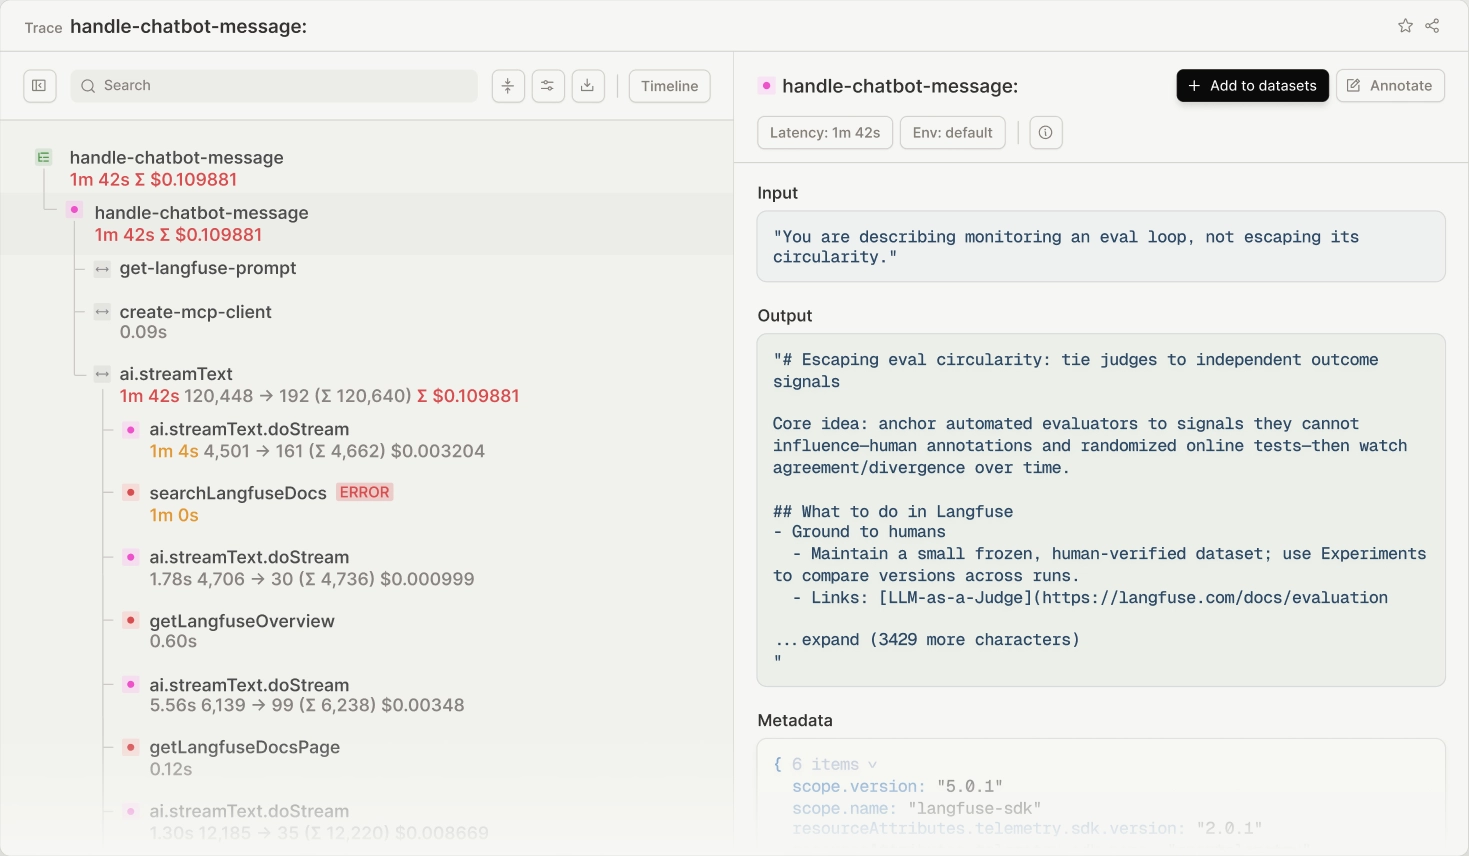
Traces show the full path of a request through your system, especially useful when one call triggers many others (think LLM agents making multiple tool calls, or a request that touches three microservices).
For most data scientists getting started, logging is enough.
But once you’re working with multi-step LLM agents, distributed pipelines, or anything where one request fans out into many, tracing becomes the more useful tool.
Tools like MLflow (for ML experiments and LLM traces), OpenTelemetry (the underlying standard), and platforms like LangSmith or Arize are where you’d go next.
You don’t need any of that yet. Logging is the foundation. Just know it’s the entry point, not the destination.
Using AI to make logging cheap
Same pattern as with testing: setting up your project’s instruction file is what makes AI actually useful here.
A useful starter for the logging section of your CLAUDE.md:
## Logging
- Use Python's built-in `logging` module. Never use `print()` for anything beyond ad-hoc debugging.
- Logger setup goes in a central module (`logging_config.py`), not scattered through the codebase.
- Format: plain text in development, structured JSON in production.
- Use `logger.exception()` inside `except` blocks to capture full tracebacks.

## Logging rules
- Never log credentials, API keys, passwords, or PII. Redact before logging.
- Log enough state to debug, not so much that logs become noise.
- Use INFO for normal events, WARNING for unexpected-but-recoverable, ERROR for failures.
The PII rule matters more than it looks.
AI doesn’t always know what’s sensitive in your domain. Without an explicit rule, it will happily log full user objects, full request bodies, and full responses, including the parts you really don’t want sitting in a log aggregator.
A few prompts that work well:
“Add logging to this function at appropriate levels. Log enough state that I could debug this in production. Don’t log any user PII.” Specifying the constraint matters.
“Review these log statements. What’s missing that I’d actually want when debugging this in production?” Useful for tightening up existing code.
“This function uses
print()throughout. Replace each one with the appropriate logging call.” Quick win for legacy code you’re cleaning up.
💡 AI tends to generate logs that look impressive but don’t actually help you debug. Lots of
logger.info("Starting X")andlogger.info("Finished X")without any of the state you’d actually want when something goes wrong. When you review what it produces, ask yourself: if this code failed at 3am, would these logs help me figure out why? If not, push for more specific state.
Try it on your own
Reading about testing and logging gets you halfway there. The other half is feeling what it’s like to actually do it: watching a test catch a bug you introduced, seeing logs tell you exactly what your code was doing.
I put together a short Google Colab notebook with a few examples to work through. You’ll write your first pytest test, watch it catch a bug, and replace print() with proper logging.
Nothing heavy, maybe 15 minutes.
If you’d like a guided walkthrough, I also recorded a short video covering the same examples.
💡 Once you’ve done the notebook, pick one script you’ve already written and apply both habits to it. Replace one
print()with alogger.info(). Refactor one function to be testable, and write one test for it. That’s the move that makes it stick.
Final thoughts
The reason these two habits are so underrated isn’t that they’re hard.
It’s that they don’t feel like the “interesting” parts of data science work. Testing isn’t modeling. Logging isn’t analysis. Neither one shows up in a portfolio.
But they’re the difference between code you can trust and code you can only hope works. And once you’re shipping things real people depend on, that difference becomes everything.
A couple of other great resources:
🎥 Want to follow along on YouTube? I just launched a channel for data scientists. Subscribe, first video drops soon.
🤝 Want to connect? Find me on LinkedIn, where I share more on data science careers and the AI shift.
Thank you for reading! And stay tuned for next week’s article in the Engineering Skills for Data Scientists series.
- Andres Vourakis
Before you go, please hit the like ❤️ button at the bottom of this email to help support me. It truly makes a difference!