


Before we begin the article…
I'm running a live six-week cohort on taking ML models to production. It starts September 8, and seats are limited (8 data scientists have already enrolled)
That’s great, but…
This is the reaction every stakeholder has after you announce you built yet another great ML model, but there are no plans to move it out of its Jupyter notebook.
They are dying for you to answer, “How can I actually use it in my day-to-day?“
The future of data science isn’t just in building models or running analyses. It is in making sure your work can be reproduced and actually used by others:
If your notebook only runs on your laptop, it does not create a lasting impact.
If your model cannot be shared, it never reaches its potential.
As the field continues to move from individual experiments to collaborative projects and production systems, these challenges matter more than ever.
Reproducibility and accessibility are no longer nice-to-haves. They are the foundation of professional data science.
This is where Docker comes in. It gives you a way to package your work so it runs the same everywhere and can be shared without the usual dependency headaches.
So if you give me 5 minutes, I promise to get you started using Docker.
Here’s what we’ll cover:
Why Docker matters for Data Science
Docker Images vs. Containers
Dockerfile basics
🎥 Docker in action demo
Why Docker matters for Data Science
In data science, two challenges come up again and again:
Reproducibility: making sure your code runs the same way today, tomorrow, and on someone else’s machine.
Accessibility: making your work usable by others, whether that is a stakeholder opening a dashboard or a teammate testing your model.
Docker tackles both.
By packaging your environment into a container, you avoid the dependency issues and version conflicts that often break projects. Once your work is in a container, it is no longer tied to your setup. It can be shared, deployed, or scaled without worrying about the hidden details of your machine.
Here are three examples that show what this looks like in practice:
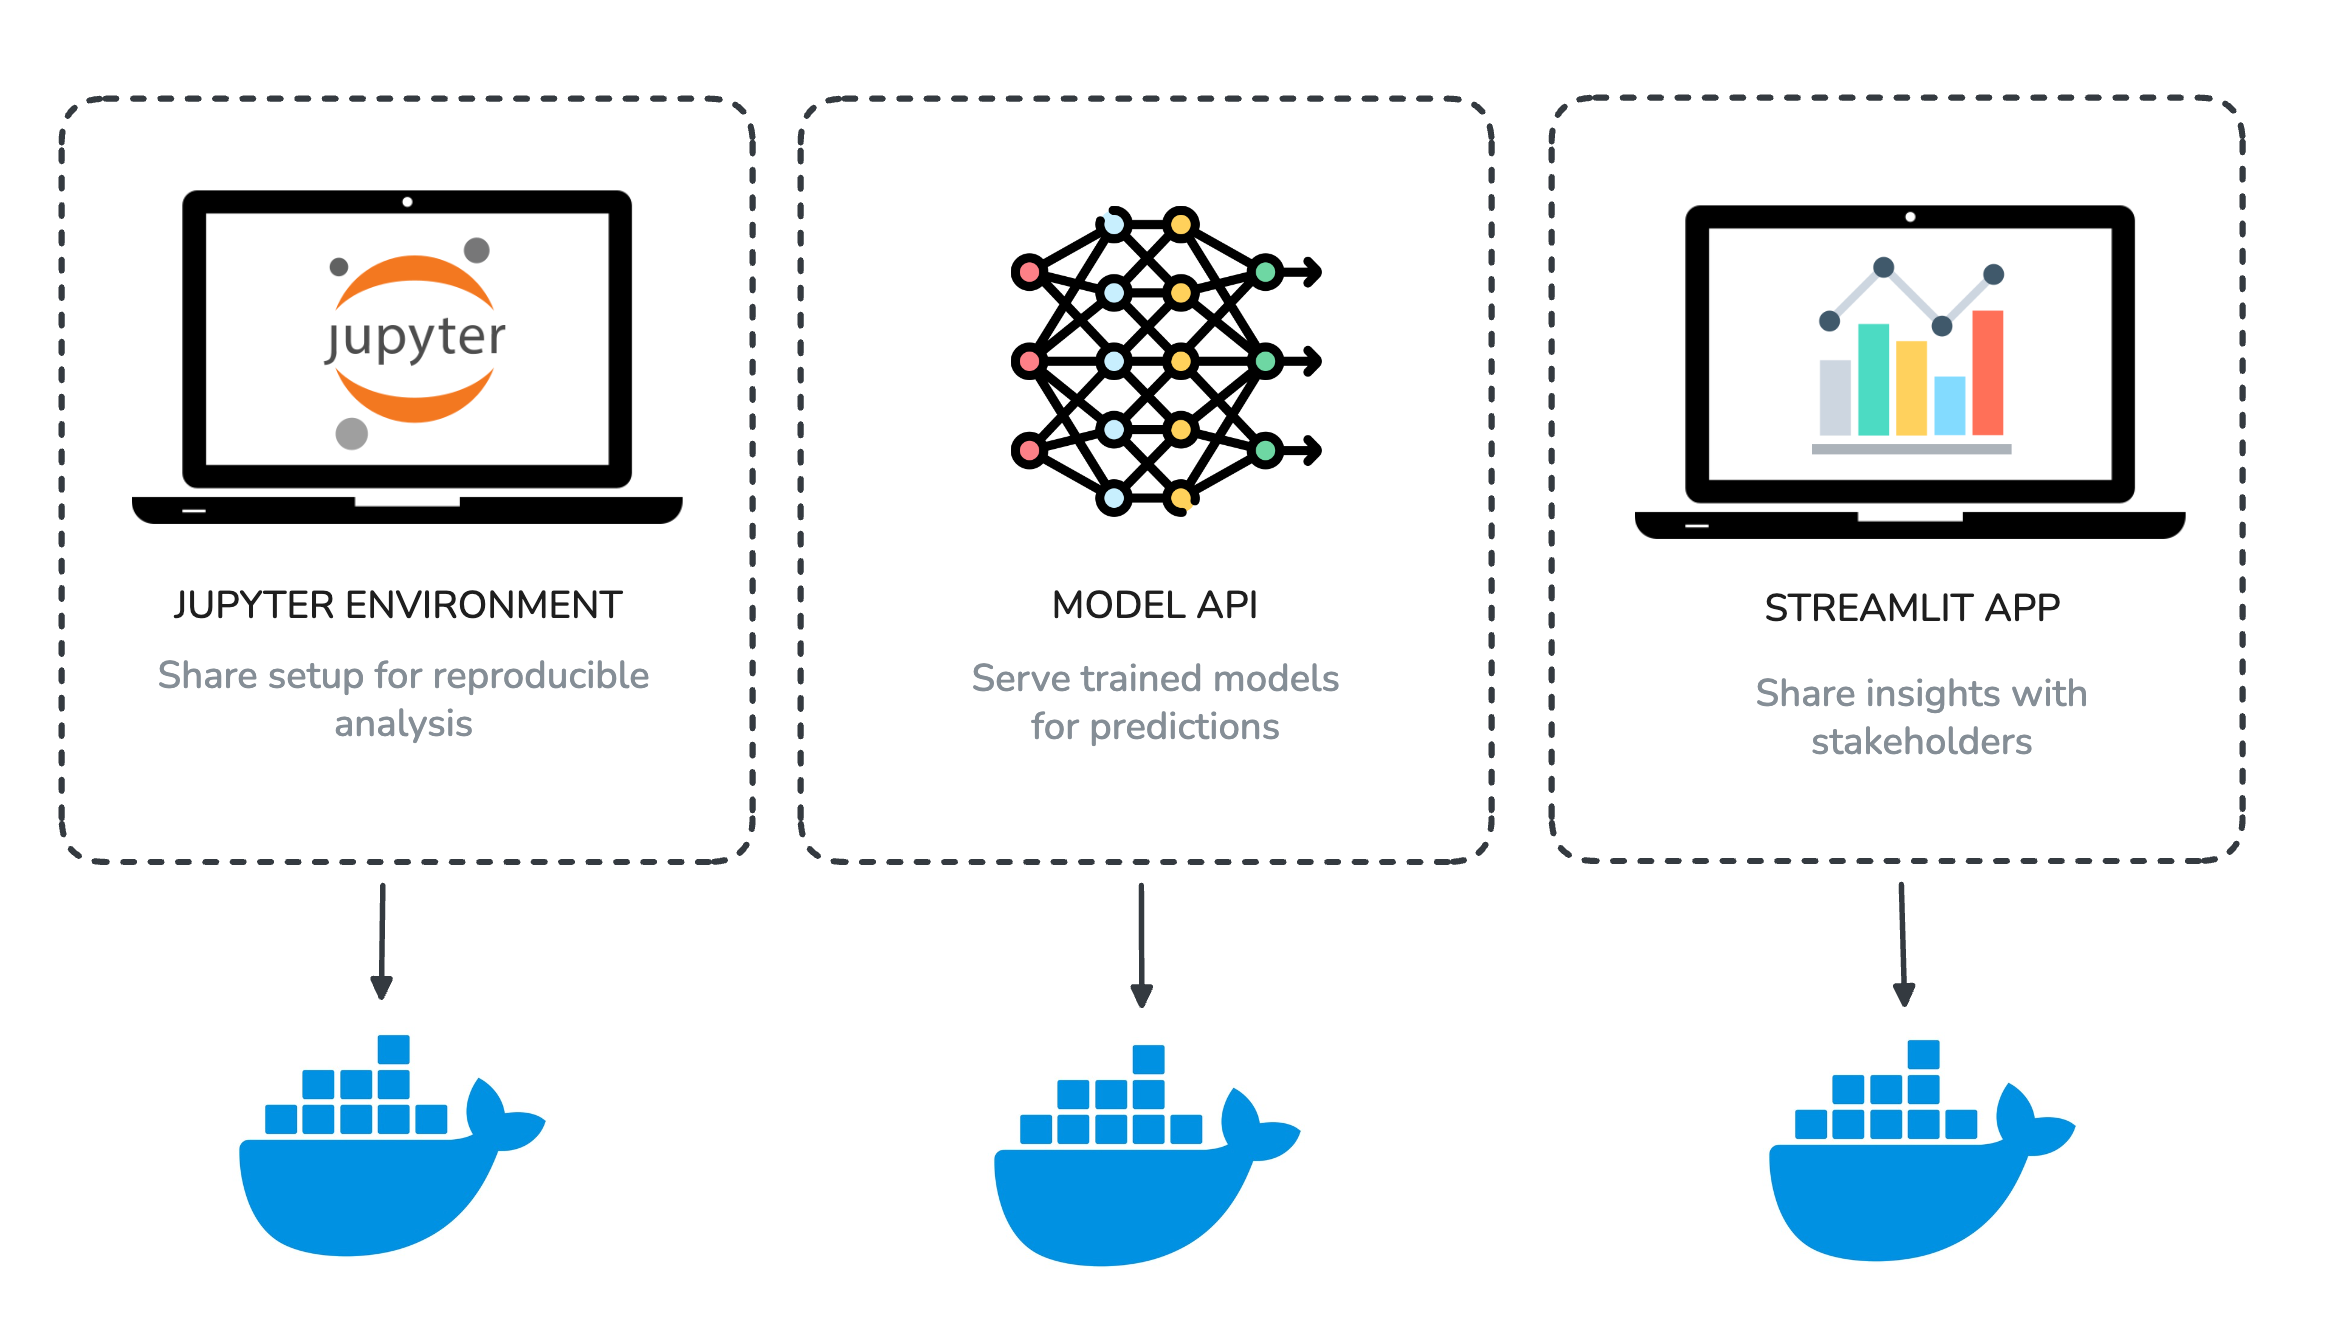
Jupyter Notebook Environment
Spin up a ready-to-use JupyterLab with Python and all your favorite libraries pre-installed. Instead of fighting with conda or pip, you and your teammates can share the same reproducible setup with one command.
Machine Learning Model API
Package a trained ML model (like a churn predictor or recommendation engine) inside a Flask or FastAPI container and expose it as an API. This makes your model available for real-time predictions that other apps, dashboards, or teammates can call directly.
Streamlit Dashboard
Wrap your Streamlit app inside Docker so it can be deployed anywhere with zero setup. Great for sharing interactive dashboards or prototypes with stakeholders without worrying about their local Python setup.
Docker Images vs. Containers
A common source of confusion when learning Docker is the difference between an image and a container.
Think of it like this:
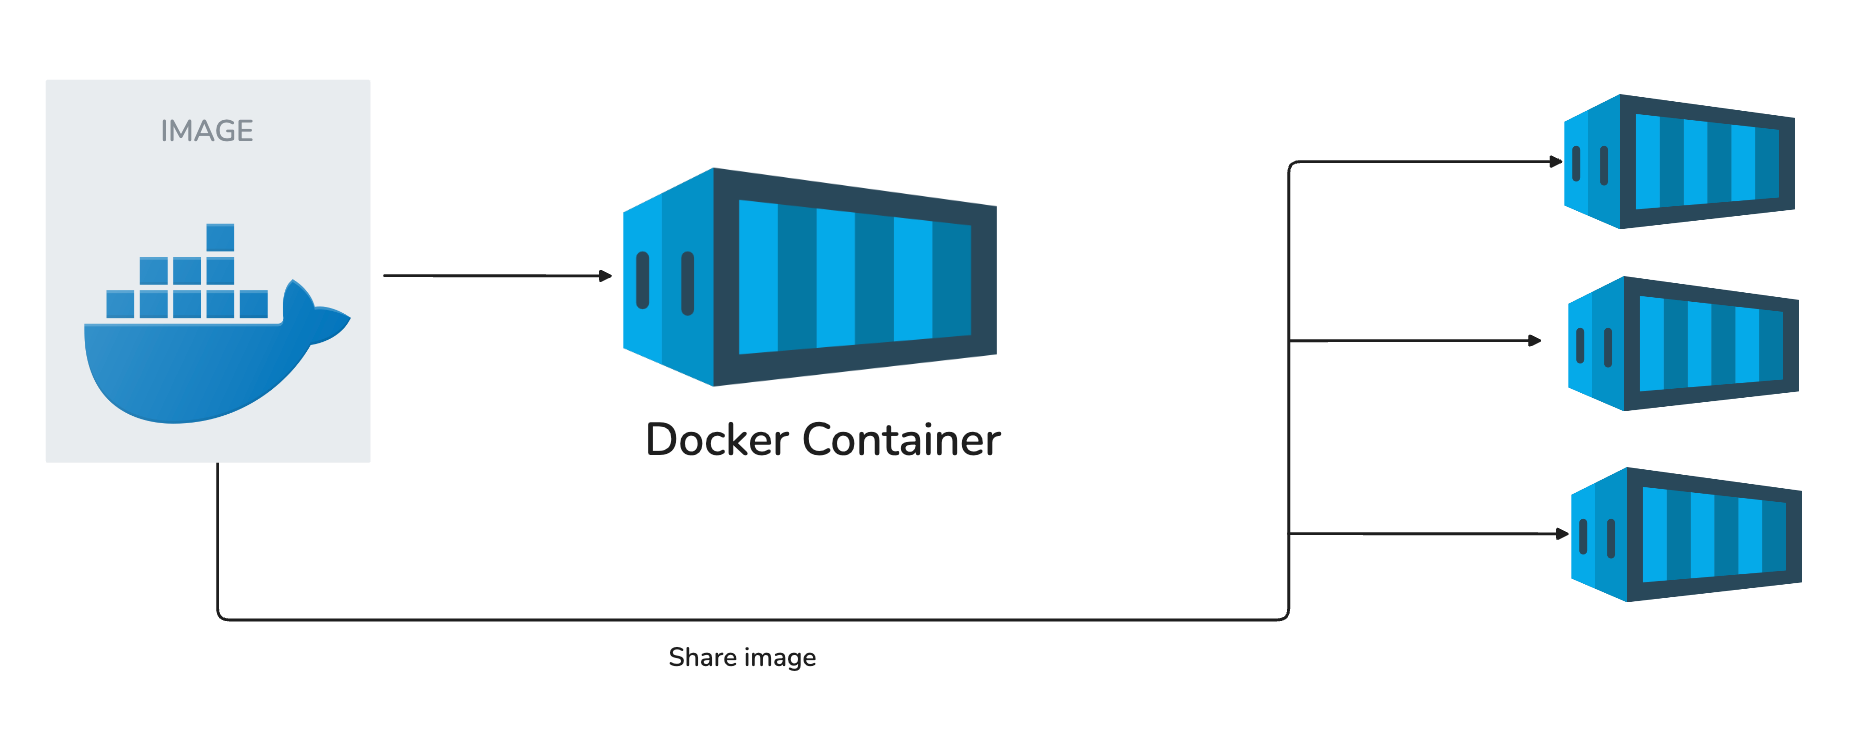
An image is a blueprint. It defines everything your project needs, such as code, libraries, and environment setup, but it does not run by itself.
A container is a running instance of that blueprint. It is what you can actually interact with, stop, or restart.
In practice, you only need to build an image once, and you can run as many containers as you want from that image
Dockerfile basics
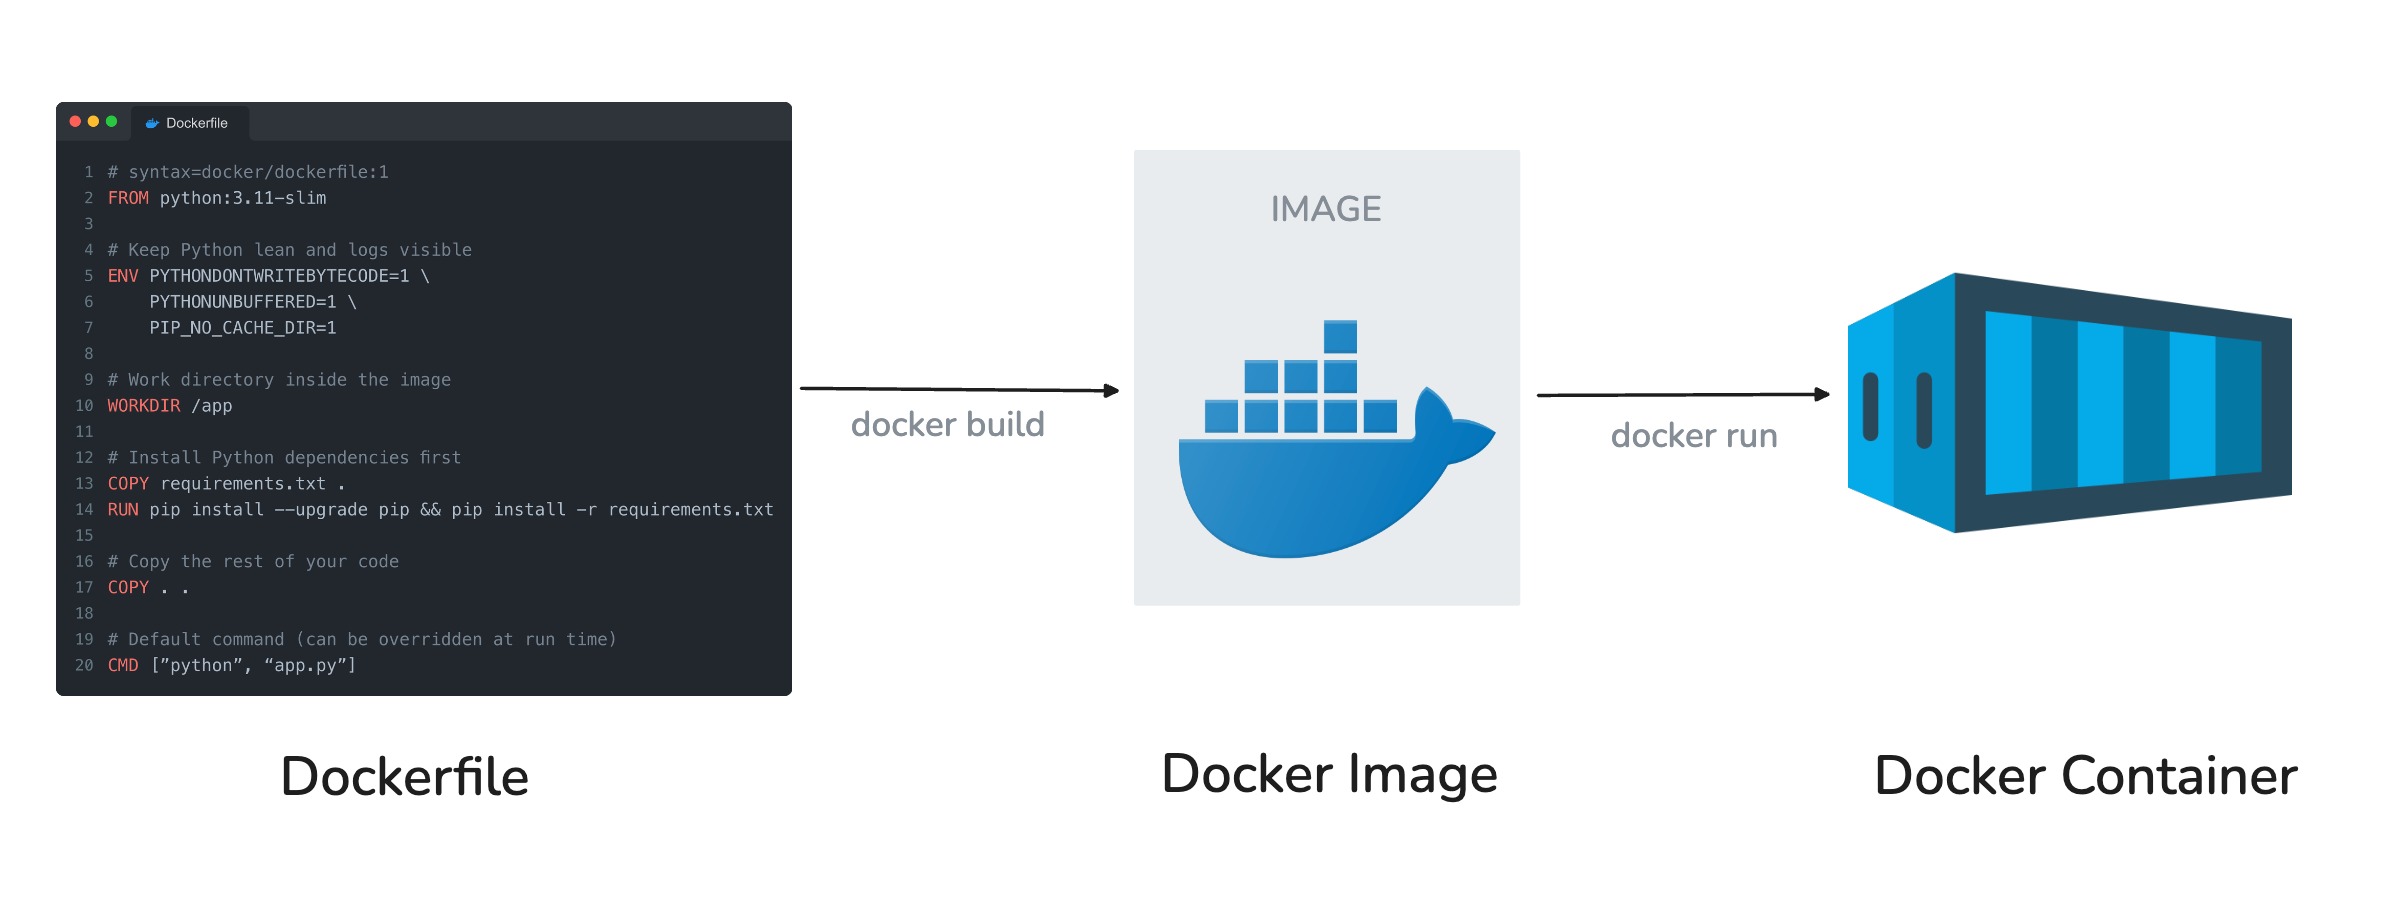
A Dockerfile is the recipe that builds your image.
Once you have an image, you can start containers that run your work the same way on any machine.
1. Project setup
Your Dockerfile goes in the project, usually in the root directory
project/
  app.py
  requirements.txt
  Dockerfile
2. Write your Dockerfile
Here is a template you can start from:
# Base image
FROM python:3.11-slim

# Environment settings
ENV PYTHONDONTWRITEBYTECODE=1 \
    PYTHONUNBUFFERED=1 \
    PIP_NO_CACHE_DIR=1 \
    PIP_DISABLE_PIP_VERSION_CHECK=1

# Working directory inside the image
WORKDIR /app

# Install dependencies first (cached layer)
COPY requirements.txt .
RUN pip install -r requirements.txt

# Copy the rest of the project
COPY . .

# Document the port the app listens on
EXPOSE 8000

# Default command
CMD ["python", "app.py"]
What each line means:
FROM: chooses the base image (a lightweight Python in this case).
ENV: sets flags that reduce clutter and keep logs visible.
WORKDIR: defines the working directory inside the image.
COPY requirements.txt + RUN pip install: installs dependencies in a cacheable layer.
COPY . .: copies your project files.
CMD: tells Docker what to run when the container starts.
4. Build the image
From the project root, run:
docker build -t my-app:latest .5. Start a container
Run your app with:
docker run --rm my-app:latestIf your app serves HTTP, map a port:
docker run --rm -p 8000:8000 my-app:latestVideo Walkthrough
Here is a quick walk-through of how to build a Docker image and run a container:
Pro Tips
Now, let me give you two tips that will make your life much easier when working with Docker.
Pro tip #1: Add a .dockerignore file
This will keep builds fast and images small.
This file tells Docker which files and folders to skip when copying your code into the image. Without it, everything in your project directory is included by default, which can bloat your image with things like cached files, large datasets, virtual environments, or even your entire .git history.
A good starting point:
__pycache__/
*.pyc
*.ipynb_checkpoints
.env
.venv/
.git/
data/
This way, your image contains only what it actually needs to run, nothing more. It speeds up the build process, keeps images lighter, and avoids leaking sensitive or irrelevant files.
Pro tip #2: Use Docker Compose
This will help you skip long commands during development and set you up for orchestration if ever needed.
Once your docker run commands start piling up flags (ports, volumes, env variables, names), typing them out every time gets annoying fast. Docker Compose lets you put all of that in one file and run it with a single command.
Create a docker-compose.yml in your project root:
services:
  app:
    build: .
    ports:
      - "8000:8000"
Then instead of the long docker run, just run:
docker compose upJust keep in mind that Compose can do much more. It’s really made for setups with multiple containers (like an app plus a database), but even for a single container, it saves you from typing the same command over and over.
Wrapping up
That’s it!
That’s all you need to get started with Docker. You can read this article in just 5 minutes to get the intuition.
But I strongly suggest you don’t stope there. Grab some coffee, put on a timer for 20 minutes, and get your first Docker container running.
That’s your first real step into deployment, which unfortunately, many data scientists never take it because they get intimidated by the terminology.
Now, there’s last thing I want to mention before you go: please don’t stress about Kubernetes.
Kubernetes gets thrown around a lot in production ML conversations, and it can sound like the natural next thing to pick up. It’s not. Kubernetes is for orchestrating containers at scale, and most data scientists don’t ever touch it directly. It’s usually the job of your team’s platform or ML engineers.
Once you’re comfortable with Docker, you can do some light reading on what Kubernetes is and why it exists. Just enough to understand where your containers fit in a bigger production setup. That alone makes you more valuable in conversations with engineering teams, without having to actually run a Kubernetes cluster yourself.
Docker first. Kubernetes later, and only as much as you need.
A couple of other great resources:
📚 Want to improve your engineering skills? Check out my free series on Engineering Skills for Data Scientists.
🎥 Want to follow along on YouTube? I just launched a channel for data scientists. Don’t forget to subscribe to not miss any videos.
Thank you for reading! I hope this guide helps you get started with deployment.
- Andres Vourakis
Before you go, please hit the like ❤️ button at the bottom of this email to help support me. It truly makes a difference!
Big +1 for Docker for reproducibility!