

👨💻 Welcome to the Engineering Skills for Data Scientists series, where I’ll be teaching the engineering skills that quietly separate data scientists who can ship from the ones who can’t. This is article 5 of 5. You can find the full series here.
Here’s a moment that probably feels familiar by now…
You’ve spent the past few weeks getting serious about your engineering habits. You write tests. You manage your environments with uv. You wrap your models in FastAPI. You log what your code does in production.
And then you push your code, and nothing happens. You have to manually:
Run the tests.
Deploy the service.
Check that the environment is reproducible.
Try to remember which checks you’re supposed to run before merging, and which ones can wait until later.
The problem with doing this process manually is that you’ll eventually forget something.
This is the gap CI/CD closes. It’s the layer that takes the habits you’ve already built and makes them happen automatically, every time you push code.
This is the final article in the series, and there’s a reason I saved it for last. Each of the previous four articles taught you a habit. This one shows you how to wire them together so they actually run without you thinking about it. It’s also the article where you’ll see how the rest of the series fits together in a real workflow.
Let’s get to it!
Here’s what we’ll cover
What CI/CD actually is (and why it’s not just for engineers)
What CI/CD looks like across the four kinds of work data scientists actually ship
Building your first GitHub Actions workflow, step by step
🎥 Try it on your own (a small starter repo)
How CI/CD ties the rest of the series together
What CI/CD actually is
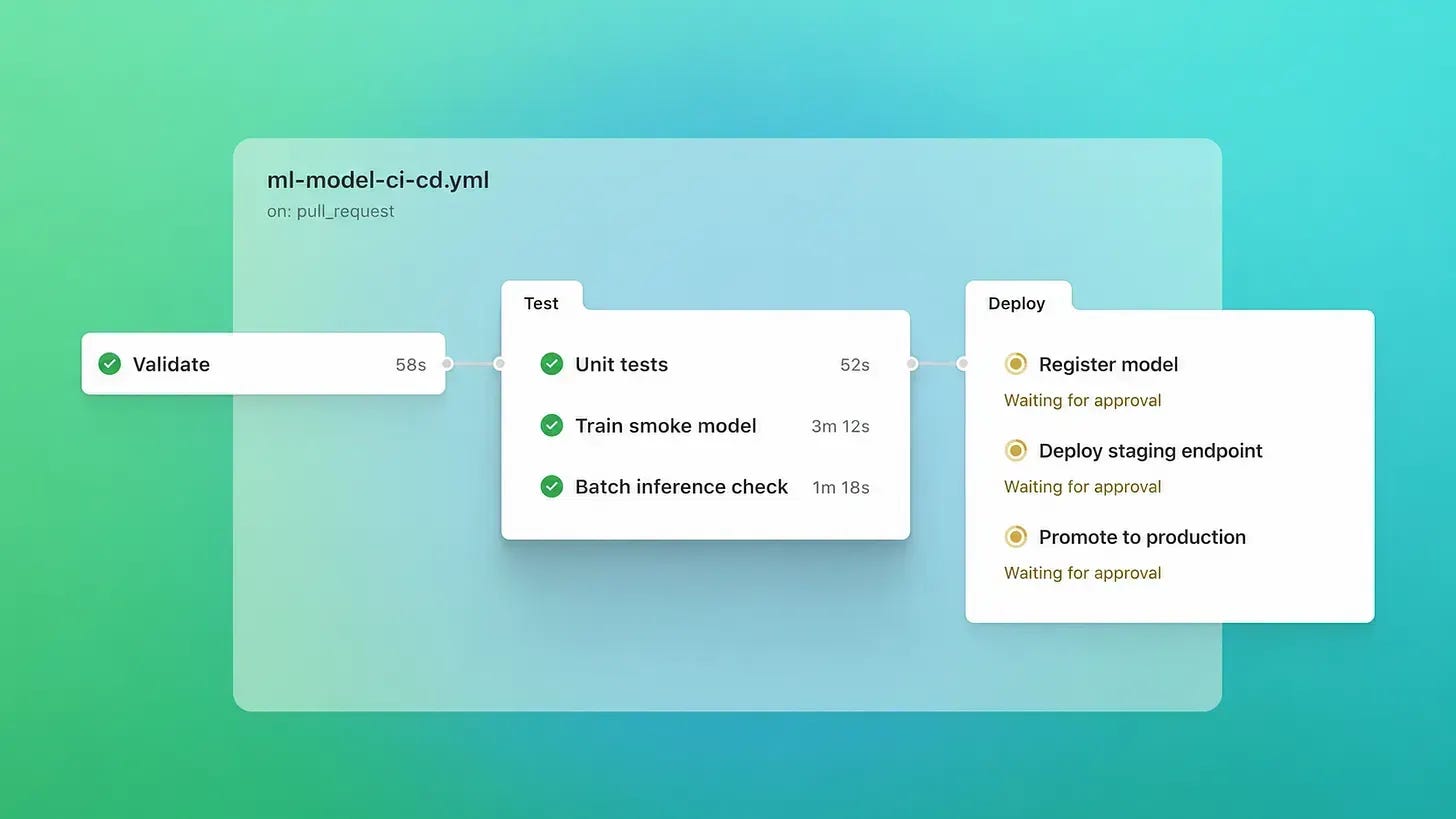
The term CI/CD gets thrown around in a way that makes it sound like one thing. It’s actually two related but distinct ideas.
Continuous Integration (CI) is the part that runs every time you push code. It executes a series of automated checks (usually tests, linting, type checking, sometimes a smoke test) and either gives you a green check or a red X. If the checks fail, you fix the code before merging. If they pass, you have a much stronger guarantee that the change you’re about to merge doesn’t break anything you care about.
Continuous Deployment / Delivery (CD) is what happens after the checks pass. When code lands on a specific branch (usually main), the system automatically deploys it somewhere. A new container gets built and pushed. A scheduled job gets updated. A dashboard gets redeployed to its hosting platform. Whatever “deployment” means for your specific project, CD makes it happen without you running commands manually.
Together: you push code, CI verifies it, and CD ships it. The whole loop runs in minutes, hands-off.
Why this matters for data scientists specifically
There’s a version of this you might have heard before: “CI/CD is for engineers shipping production services.” That used to be more true than it is now. Today, if you’re a data scientist shipping anything beyond a notebook, CI/CD is how you keep your work reliable without depending on memory.
Two reasons it matters more for you than it used to:
The cost of shipping wrong has gone up. When your work was a slide deck or an analysis, a mistake meant a stakeholder asked a question. When your work is a model behind an API or a scheduled training pipeline, a mistake means real users get wrong predictions for hours before anyone notices.
The complexity of your projects has gone up. A modern data science project has dependencies, environment configurations, multiple services, sometimes external API calls to LLM providers. Manually checking all of that on every push is unrealistic. CI/CD is how you stop manually checking.
What CI/CD looks like across the four kinds of data science work
Every CI pipeline checks four things in roughly the same order: does the environment install, do the tests pass, does the code lint cleanly, and does the service start. What changes across projects is the specifics. Here’s how it plays out across the four kinds of work data scientists are doing right now.
1. ML training pipelines
You’re maintaining a model that gets retrained regularly. The codebase is the training pipeline itself: data loading, feature engineering, model fitting, evaluation, registration.
What CI checks on every push:
Tests pass (unit tests on transformations, edge cases on feature logic)
The Pydantic schema for your input data still validates
The pipeline can run end-to-end on a small sample of data (a smoke test, not a full training run)
What CD does on merge:
Updates the scheduled training job (Airflow, Prefect, cloud scheduler) to point at the new code
Optionally triggers a full retraining run, with the resulting model pushed to a registry like MLflow
What’s different here: training is expensive. CI doesn’t retrain the full model on every push. It just confirms the pipeline still works on a sample. The real retrain happens on a schedule, not on every commit.
2. Real-time inference services
You’ve wrapped a model in FastAPI (article 4). Every prediction request hits a live endpoint somewhere.
What CI checks on every push:
Tests pass
The container builds successfully
The service starts and the endpoints respond to a smoke test
Pydantic request validation works as expected
What CD does on merge:
Builds a new container image
Pushes it to a registry
Deploys it to a hosting platform (Render, Fly.io, AWS, GCP)
Runs a final health check on the deployed service
This is the scenario I’ll walk through in detail in the next section, since it ties most directly to what you built in article 4.
3. AI workflows and RAG systems
You’re building something that orchestrates LLM calls: a RAG retrieval system, an agent, a structured-output extraction workflow.
What CI checks on every push:
Tests pass (using mocked LLM responses, not real API calls)
Pydantic schemas for prompts and responses validate
Contract tests confirm your code handles malformed LLM output gracefully
What CD does on merge:
Deploys the workflow to whatever runs it (often a FastAPI service, sometimes a scheduled job)
What’s different here: you don’t want CI to call real LLM providers. It costs money, it’s flaky, and it makes your tests non-deterministic. The standard pattern is to mock the LLM responses in CI and rely on separate evaluation pipelines (run less frequently) to test actual model behavior. Pydantic plays a starring role in this scenario. The schemas you defined for LLM outputs are exactly what your tests verify.
4. Dashboards and notebook-based apps
You’ve built a Streamlit dashboard, a Hex notebook, or a Hugging Face Space. The output is something a human interacts with directly.
What CI checks on every push:
Tests pass
The app at least imports cleanly (so you don’t ship a Streamlit app with a typo that breaks the whole page)
Lint and type checks pass
What CD does on merge:
Deploys to Streamlit Cloud, Hugging Face Spaces, Hex, or wherever the app lives. Often this is a single platform integration that handles everything for you.
What’s different here: the CI is simpler because there’s less backend logic, and the CD is mostly “push it and let the platform handle it.” This is the lowest-effort scenario, which is part of why these tools have gotten so popular.
The pattern across all four
Notice what’s consistent: the checks CI runs are the same skills from the previous articles (tests, environments, schemas, services). The deployment target changes depending on what you’re shipping, but the loop is the same: push code, run checks, ship if green.
Where this skill has been a multiplier for me
Quick personal example.
The four scenarios above cover the standard ways data scientists use CI/CD. But once you have the pattern down, you start finding places to apply it that go beyond just running tests on code.
A recent one from my own work. My team uses Omni as our BI tool, which means we maintain a semantic model: the layer that defines what every metric means, what every column represents, what aliases stakeholders can use to query the data. For this to actually be useful, every new model needs to come with proper context, accurate descriptions, consistent naming, and the right AI hints so non-technical users can ask questions and get sensible answers.
The old way of enforcing all this was to remember to do it.
Read the documentation. Follow the conventions. Hope you didn’t miss anything.
Predictably, things slipped through:
A new model would land without descriptions.
An alias would conflict with an existing one.
A field would be missing the AI context that makes the BI tool actually useful for stakeholders.
So I added a CI check. A small set of rules that runs on every pull request and either fails (for hard requirements) or warns (for softer conventions), with specific feedback about what needs to change.
The system does the remembering now. That’s what I mean when I say CI/CD is a multiplier. Once the pattern clicks, you can apply it almost anywhere your team has standards that depend on humans remembering things. And that’s what quietly makes you more valuable on a team.
Building your first GitHub Actions workflow
Let’s walk through a concrete example. We’ll use scenario 2 (a FastAPI service) since it ties back to what you built in article 4. The principle generalizes to the other scenarios with small adjustments.
Step 1: Add the workflow file
GitHub Actions workflows live in .github/workflows/ in your repo. Create that directory and add a file called ci.yml:
name: CI

on:
  push:
    branches: [main]
  pull_request:
    branches: [main]

jobs:
  test:
    runs-on: ubuntu-latest

    steps:
      - name: Checkout code
        uses: actions/checkout@v4

      - name: Install uv
        uses: astral-sh/setup-uv@v3

      - name: Set up Python
        run: uv python install

      - name: Install dependencies
        run: uv sync

      - name: Run tests
        run: uv run pytest

      - name: Lint
        run: uv run ruff check .
A few things worth pointing out in this file:
The
on:block at the top defines when this workflow runs. Here it runs on every push tomainand on every pull request targetingmain.Each entry under
steps:is one thing the workflow does, in order. If any step fails, the whole workflow fails and you get a red X on the commit.The
uses:lines reference pre-built actions from the GitHub Actions marketplace.actions/checkoutclones your repo.astral-sh/setup-uvinstalls uv on the runner.The
run:lines are just shell commands. They execute on a fresh Ubuntu machine that GitHub spins up for each workflow run.
Step 2: Push it and watch it run
Commit the file and push:
git add .github/workflows/ci.yml
git commit -m "Add CI workflow"
git push
Go to the Actions tab in your GitHub repo. You’ll see the workflow running. Click into it to see each step execute live: installing uv, syncing dependencies, running pytest, running lint.
When all the steps pass, you get a green check on the commit. When something fails, you get a red X and a link to the failing step with the full error log.
Step 3: What it looks like when something breaks
Introduce a bug intentionally: fail one of the asserts in a test, or break the import in one of your modules. Push the change.
The workflow runs again, and this time the pytest step fails. The check turns red. If this push was a pull request, you’d see the check fail on the PR page itself, signaling to your reviewers that the change isn’t ready to merge.
This is the loop. The system catches the problem before it gets merged. You fix the code, push again, and the workflow re-runs.
💡 The mental shift: with CI in place, “did I run the tests?” stops being a question you have to remember to ask. The system asks it for you, on every commit, with no exceptions.
Step 4: Adding deployment (CD)
Once your CI is solid, adding deployment is mostly a matter of adding more steps. A deploy job for a FastAPI service might look something like this:
deploy:
  needs: test
  if: github.ref == 'refs/heads/main'
  runs-on: ubuntu-latest

  steps:
    - name: Checkout code
      uses: actions/checkout@v4

    - name: Deploy to Render
      run: curl -X POST ${{ secrets.RENDER_DEPLOY_HOOK }}
A few notes on what’s happening:
needs: testmeans this job only runs after the test job passes. If CI fails, you don’t deploy.The
if:condition restricts deployment to themainbranch. Pull requests don’t deploy.${{ secrets.RENDER_DEPLOY_HOOK }}is a secret value stored in your GitHub repo settings (under Settings → Secrets). This is how you give the workflow access to deployment credentials without committing them to your code.
The exact deployment step varies by platform (Render, Fly.io, AWS, GCP each have their own syntax), but the pattern is the same: run after CI passes, only on main, use secrets for credentials.
Try it on your own
I put together a small starter GitHub repo with this workflow already set up.
It’s a minimal FastAPI service with one endpoint, a few tests, and the CI pipeline you just saw. Clone it, push it to your own GitHub, and watch the workflow run. Then introduce a bug intentionally and see what happens.
If you’d like a guided walkthrough, I also recorded a short video how a CI pipeline runs inside of GitHub
💡 Once you’ve got it running, take one of your existing projects and add CI to it. Even just the test step. That’s the move that makes the rest of this stick.
Final thoughts
CI/CD is the automation layer that runs the rest of the series for you, every time you push code.
Tests don’t run themselves. Reproducible environments need to be verified. FastAPI services need to be deployed. Pydantic schemas need to keep working as the code around them changes. CI/CD is what makes all of this happen consistently, without depending on you remembering.
CI/CD is what wires all of that together into something that runs continuously, without your attention. It’s the difference between “I wrote good engineering habits” and “the system enforces good engineering habits for me, every time.”
This is also the end of the series. Five articles, five skills:
Pydantic for validating data at boundaries
Testing and logging for knowing your code works (before) and seeing what it does (after)
uv for keeping your environments reproducible
FastAPI for turning your model into a service others can call
CI/CD for running all of the above on every push, automatically
Each one is useful on its own. Together, they’re what separates data scientists who can ship from data scientists who can’t.
Thanks for following along through the whole series. I hope it gave you a real foundation, not just for these specific tools, but for the broader habit of thinking like an engineer alongside thinking like a data scientist.
A couple of other great resources:
🎥 Want to follow along on YouTube? I just launched a channel for data scientists. Don’t forget to subscribe to not miss any videos.
🤝 Want to connect? Find me on LinkedIn, where I share more on data science careers and the AI shift.
Thank you for reading! And stay tuned for next week’s article in the Engineering Skills for Data Scientists series.
- Andres Vourakis
Before you go, please hit the like ❤️ button at the bottom of this email to help support me. It truly makes a difference!